Setting up NFS Log Target in DataPower
Written by Mir Musthafa Ali Pasha
Middleware Practice Head at Royal Cyber
Introduction
This blog is written to explain how you can setup NFS log target in DataPower; the blog provides the steps to setup NFS share on windows and configure NFS log target in DataPower.
In Windows you are required to install NFS component services first, following are few steps to install services for NFS components:
- Click Start, then on to Administrative Tools, and then click Server Manager.
- In the left pane, click Roles.
- Below Roles Summary in the right pane, you can click Add Roles. The Add Roles Wizard appears. Click Next.
- Choose the File Services to install this role on the server, and then click Next.
- Select Network File System checkbox, and then click Next.
- Confirm your selection, and then click Install.
- Once the installation completes, the installation results appear. Click Close.
After installing the NFS service components next step is to share the folder as NFS Mount.
The following steps explain how to share folder as NFS mount:
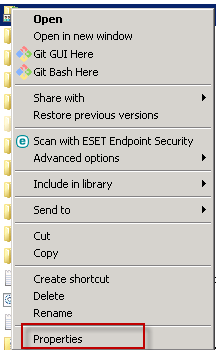
Sharing Folder as NFS Mount- 1. Right click on a folder that you want to share and click Properties.
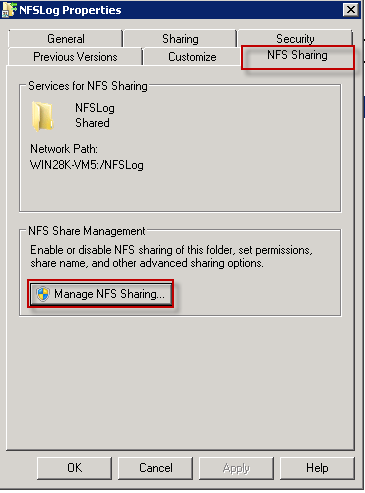
- 2. Select tab NFS Sharing and click Manage NFS Sharing.
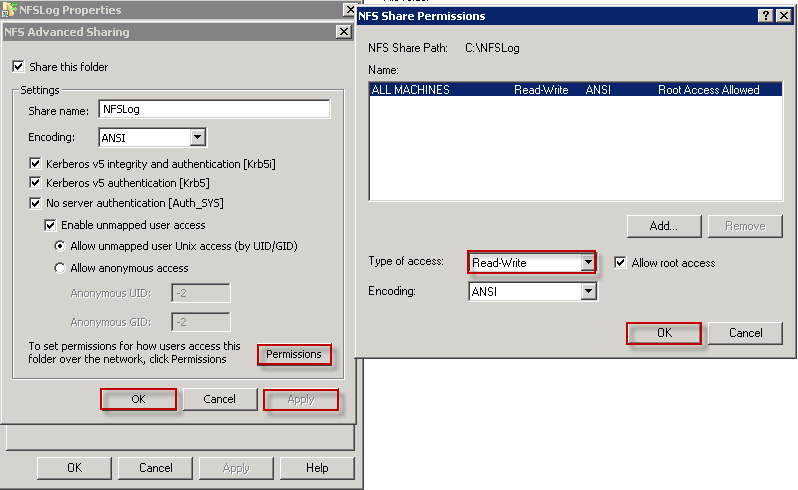
- 3. On Advance Sharing window leave all options default and click Permission, ensure you select Read-Write as Type of access, click ok on the Permission window and Click Apply and on Advance Sharing window.
Now you have shared NFS Log folder as NFS share Mount, next step is to configure NFS Log target on DataPower Appliance!
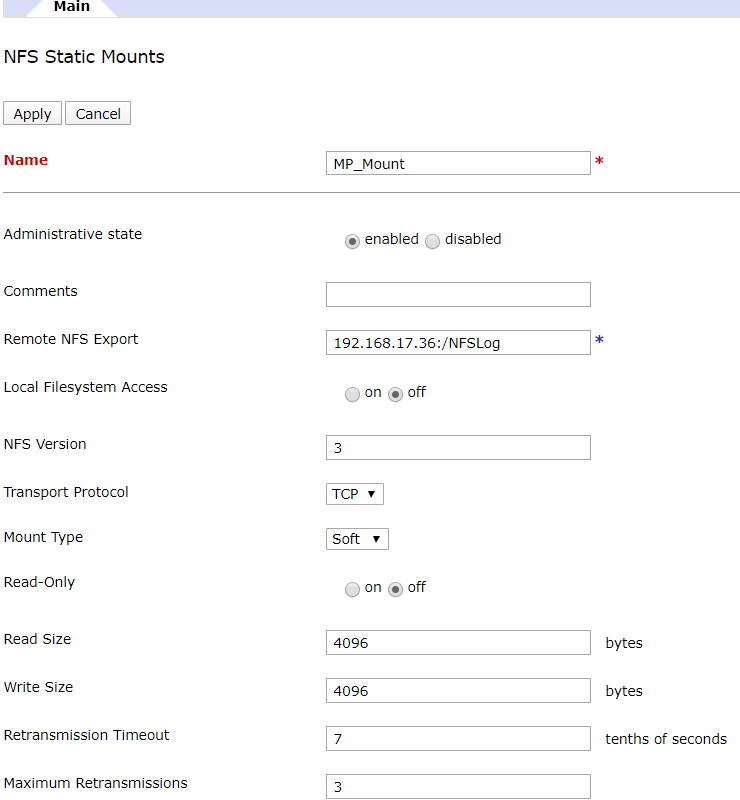
- In the search field, enter NFS Static.
- From the search results, click NFS Static Mounts.
- Click Add or New.
- Outline the basic properties: Name, administrative state, and descriptive summary.
- In the Remote NFS Export field, enter the URL of the remote exported mount.
- Change Mount Type to Soft and leave all the other options default.
- Click Apply to log the changes on the configuration.
- Save Configuration or Save changes to save the changes to the persisted configuration.
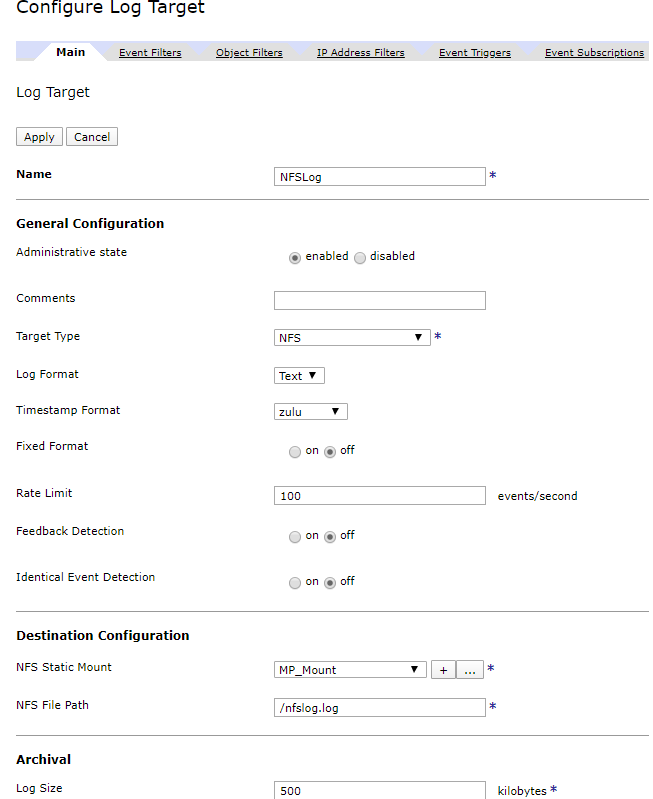
After creating the NFS Static Mount next step is to create Log target, Follow the steps given below:
- In the search field, enter the log.
- From the search results, click Log Target.
- Click Add or New.
- Describe the properties: Name, administrative state, and descriptive summary.
- Select Target type as NFS.
- Log Format as Text.
- Timestamp format as Zulu.
- Select the NFS Static Mount as MP_Mount created earlier.
- Also, give name and path of log file i.e. /nfslog.log.
- Click Event Subscriptions tab.
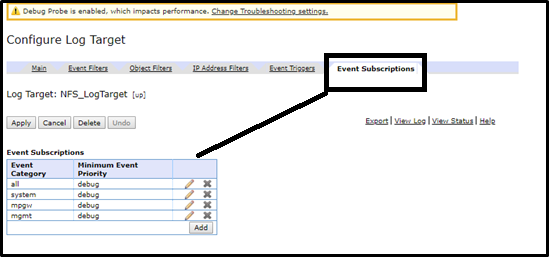
In the Event Subscriptions, configure Events Subscriptions as shown below!
- 11. Apply and save the changes to the configuration for both the windows.
- 12. Click Save Configuration or Save changes to save the changes to the persisted configuration.
Note: Make sure both NFS Static Mount and Log Target are up, down will suggest there are network issues, DataPower is not able to connect to NFS Share folder.
Summary
Here we have provided an easy guide to create log entries or capture information related to NFS Log Target in DataPower. For more information, you can email us at info@royalcyber.com or visit www.royalcyber.com.